
Open Plan Living-Dining Conservatory Extension – A Stunning Home Upgrade
Create a seamless, light‑filled space for relaxing and entertaining. Design tips, glass roof ideas, bifold doors, utility integration & expert advice.
💡 Quick answer: what is an open plan living-dining conservatory?
An open plan living-dining conservatory extension combines a lounge and dining area into one bright, glass-walled space that flows directly from your home. By removing the external wall, you create an uninterrupted connection to the garden. Features often include a gable-end roof feature, bifold or French doors, and integrated utility areas. With modern solar-control glass and underfloor heating, it’s comfortable year‑round and can increase property value by 5‑10%.
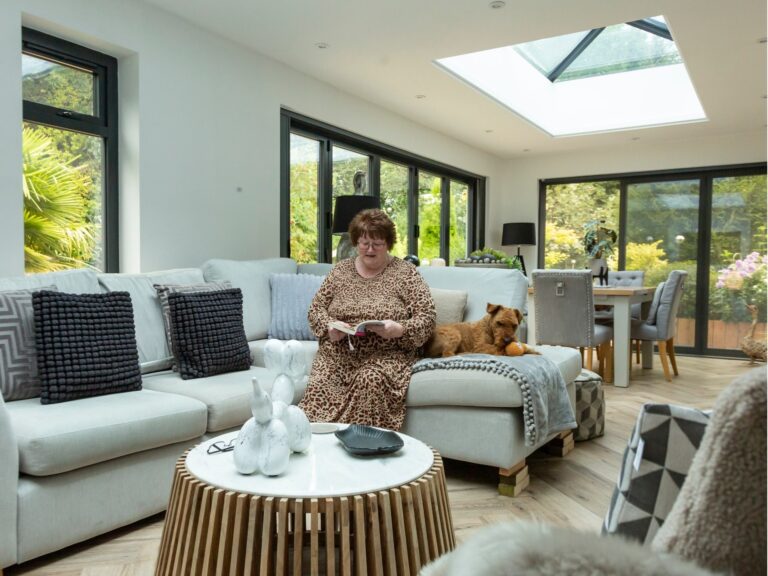
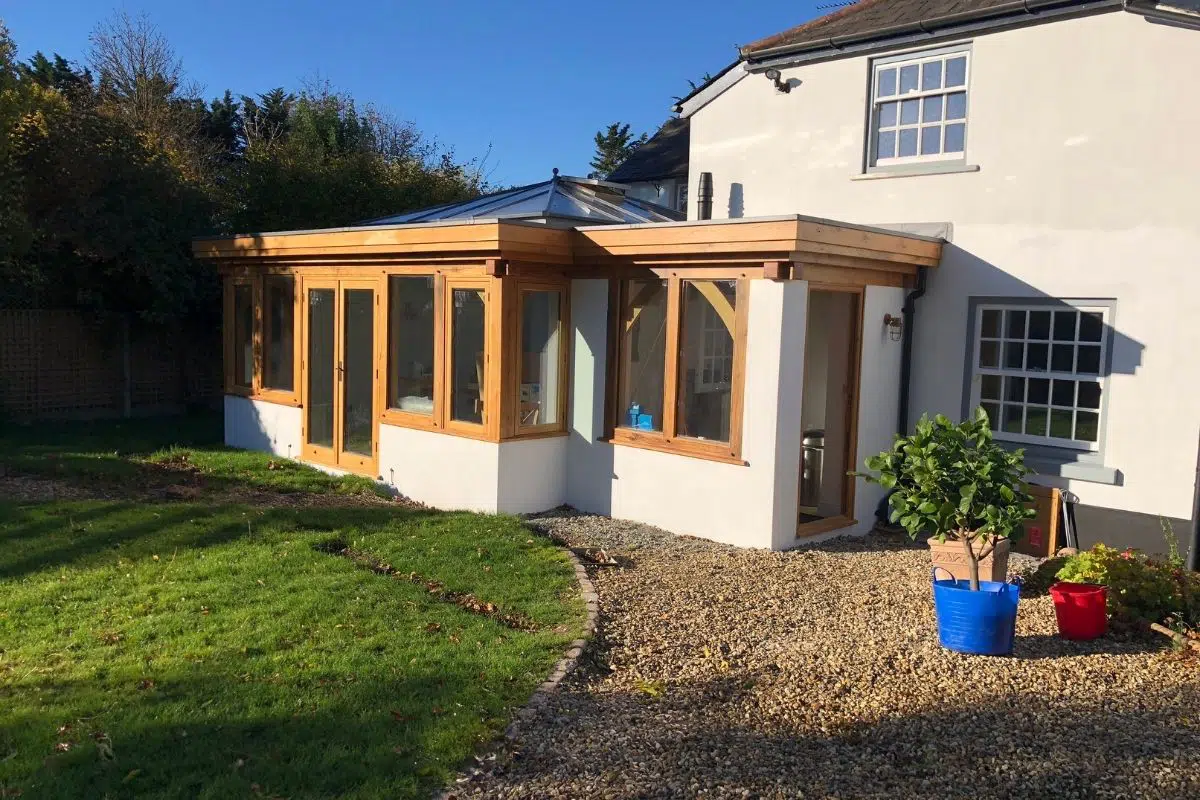
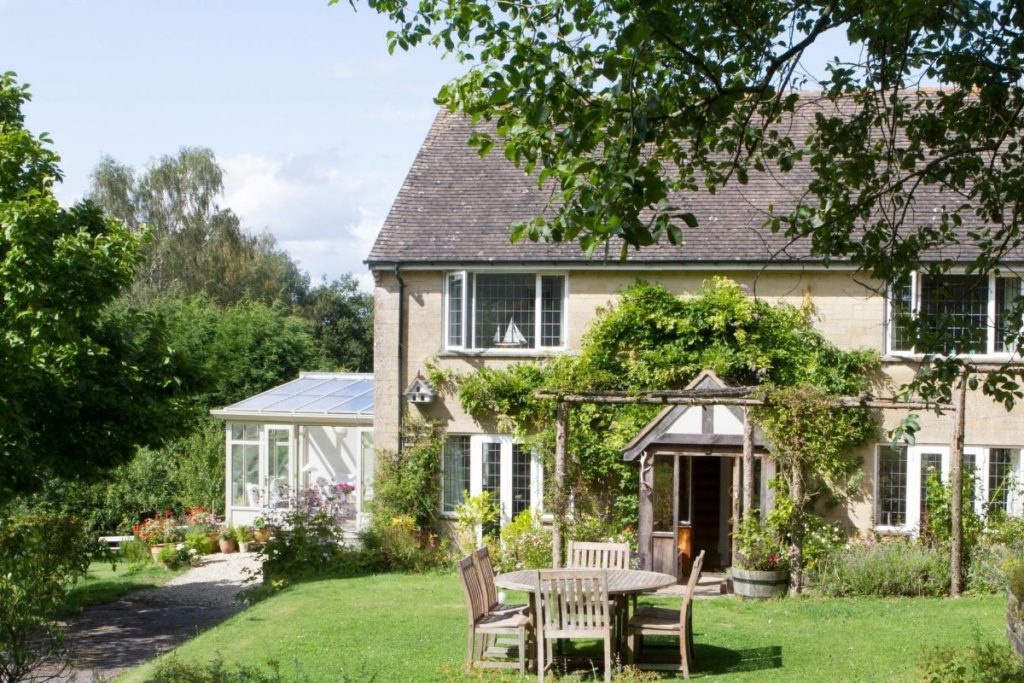
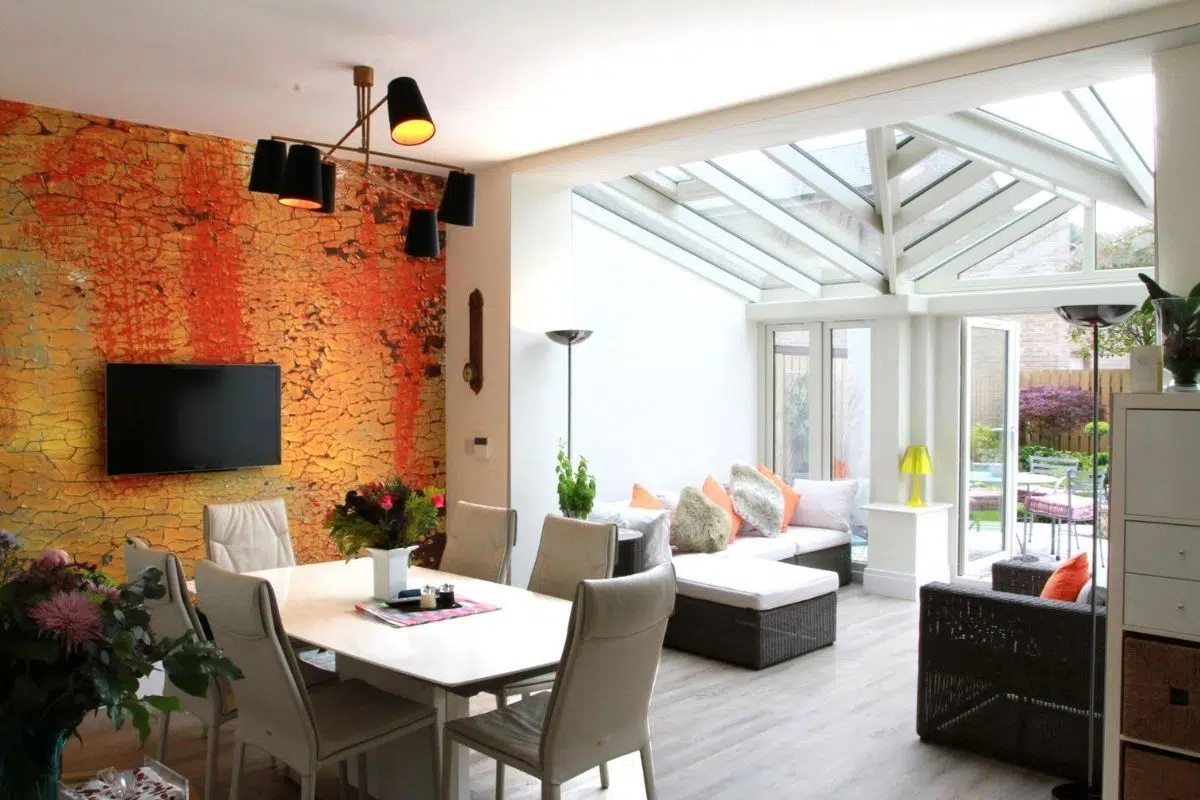
Imagine a space where family dinners flow into relaxing evenings, where the boundary between indoors and garden melts away, and where natural light fills every corner. That’s the promise of an open plan living-dining conservatory extension. Our clients, a family in West Sussex, wanted exactly that: a spacious, versatile area that would serve both as a bright dining space for entertaining and a comfortable lounge for everyday relaxation—while keeping their original living room as a cosy retreat.
In this comprehensive guide, we’ll walk through their project, exploring every design decision, structural consideration, and finishing touch that turned their vision into reality. Whether you’re planning a similar extension or just gathering ideas, you’ll find detailed insights on roof styles, door configurations, utility integration, and the technical side of removing an external wall.
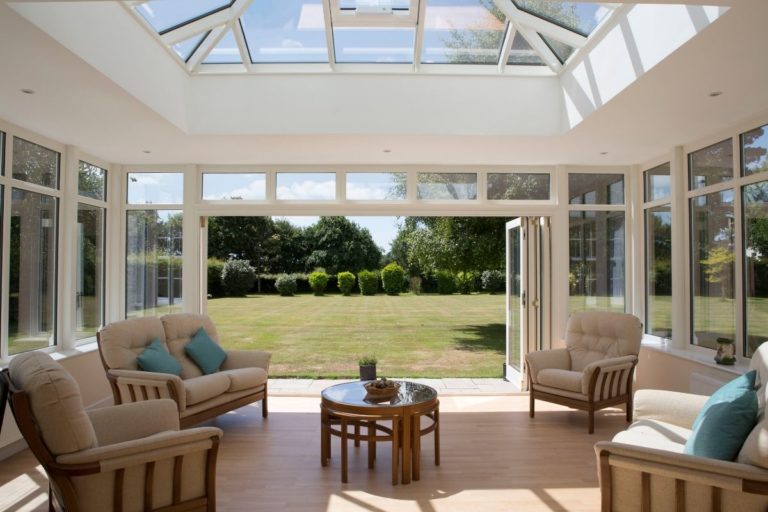
Seamless Flow Between Indoors and Outdoors

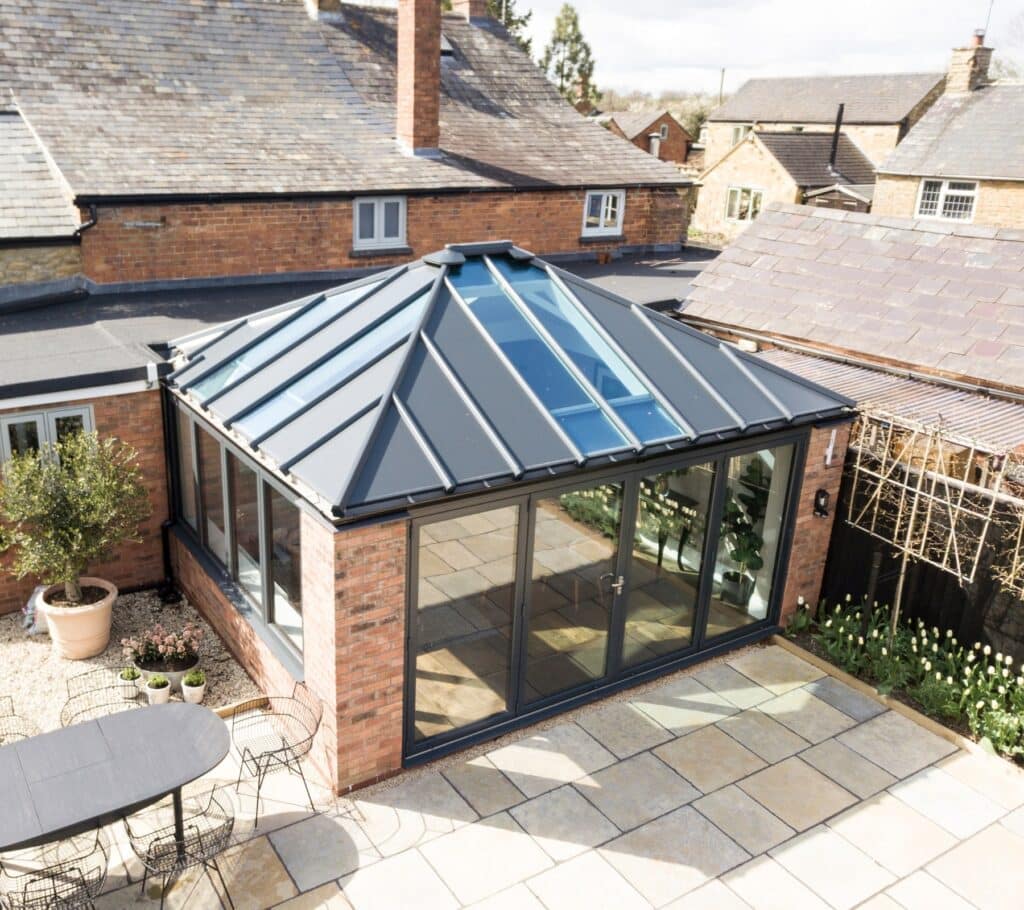
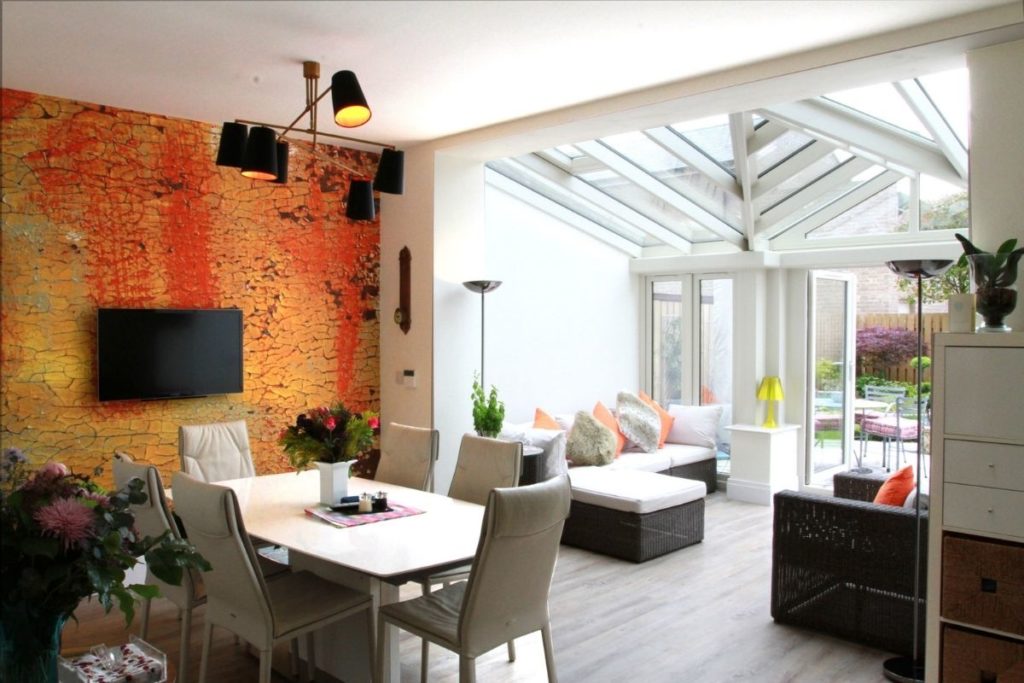
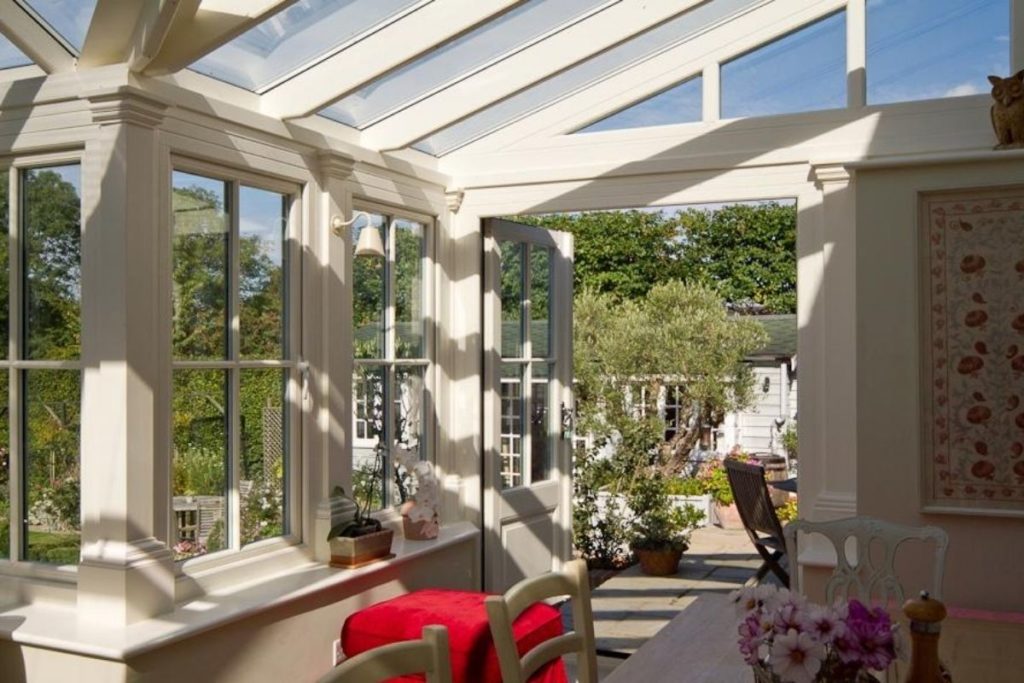
The defining feature of this project was the decision to remove the entire external wall between the existing house and the new extension. This single change transforms the experience: from the kitchen, your eye travels uninterrupted across the dining table, through the lounge, and out into the garden. No step, no narrow doorway—just a smooth transition that makes both spaces feel larger.
But removing an external wall is not a DIY task. It requires:
- Structural assessment: A steel beam (or RSJ) must be designed to carry the load of the upper floor. In this case, a 4.5m galvanised steel beam was installed, recessed into the ceiling to keep the profile clean.
- Foundations: The new extension’s foundations were tied into the existing footings, with additional depth where the original wall was removed.
- Building Regulations approval: All structural work must be signed off. Your builder or architect typically handles this.
- Temporary propping: During installation, the upper floor was supported with Acrow props to ensure safety.
⚠️ Critical: thermal bridging
When removing a wall, ensure the new junction between house and extension is properly insulated to prevent cold spots. Use thermally broken cavity trays and continuous insulation.
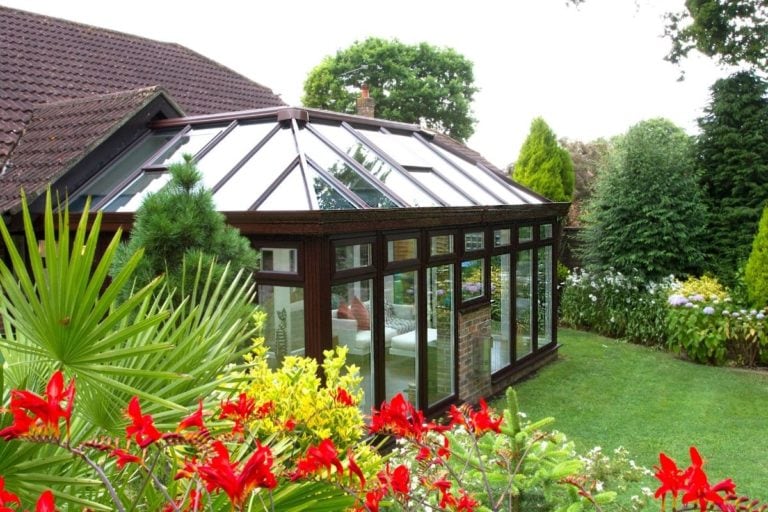
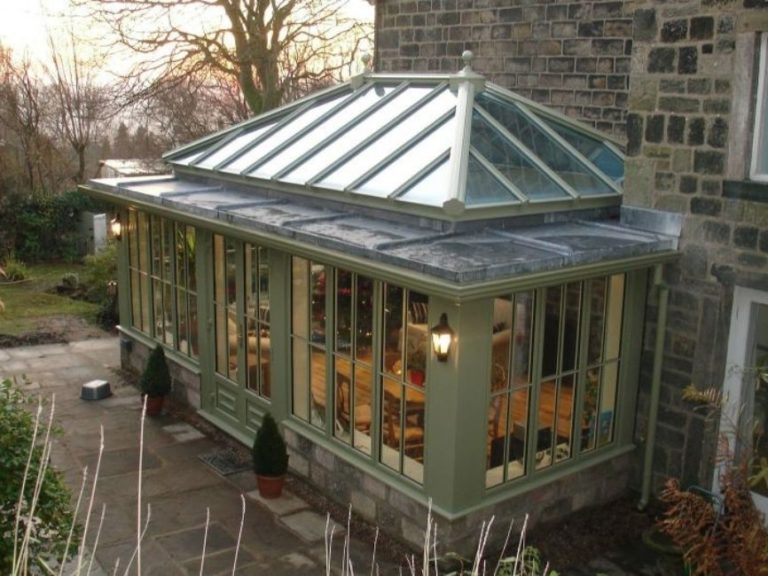
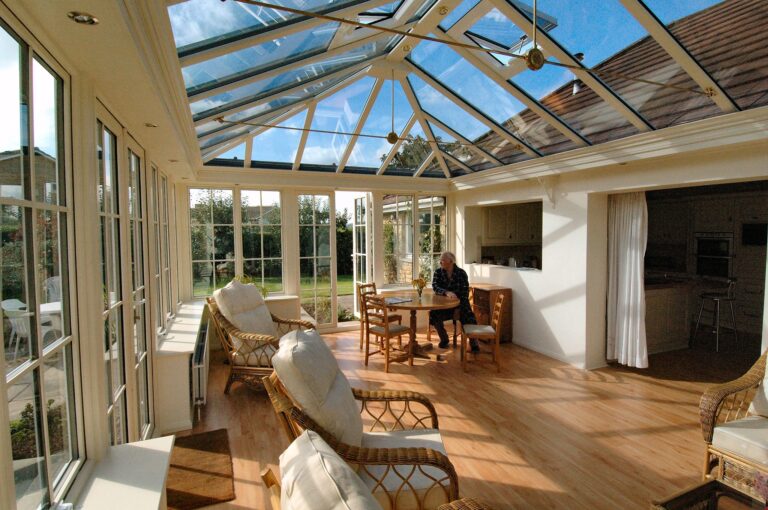
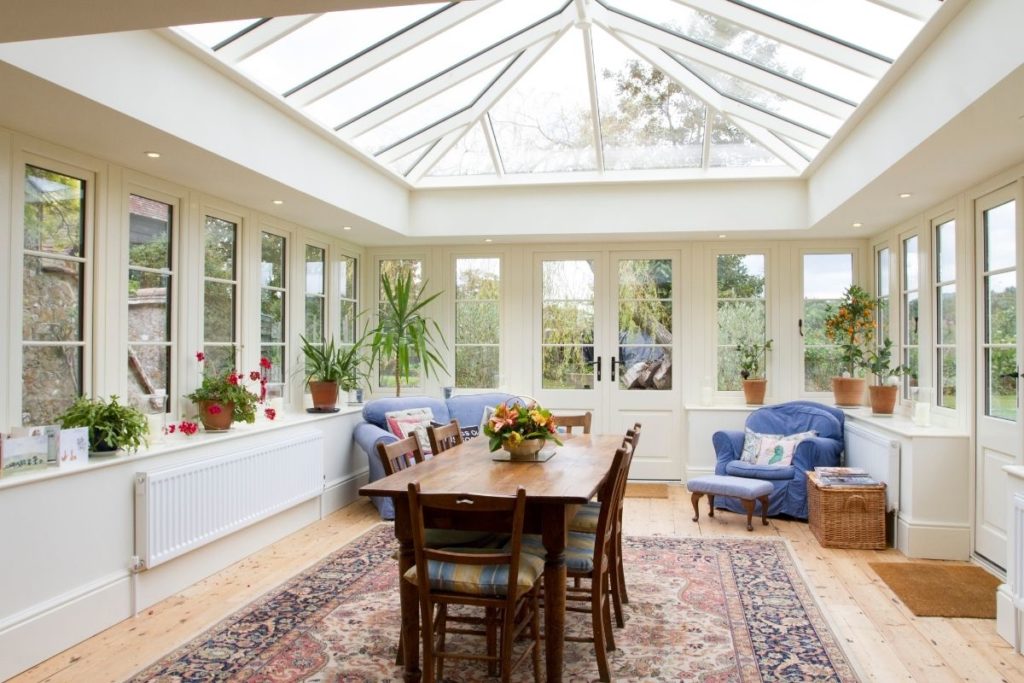
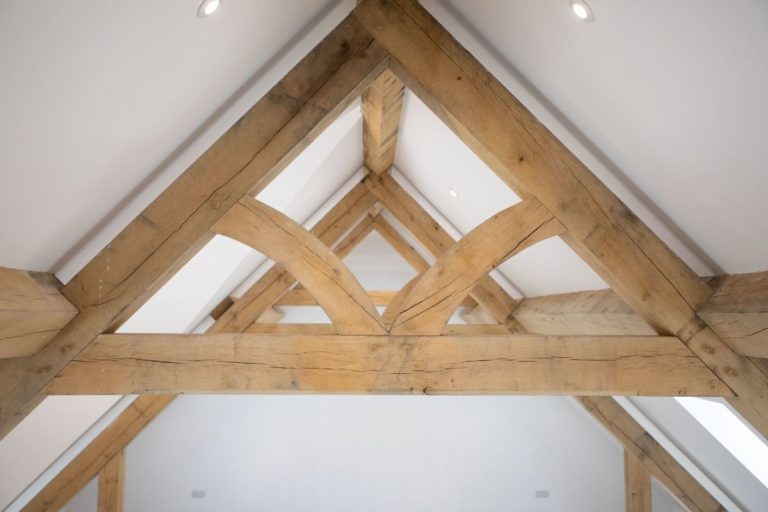
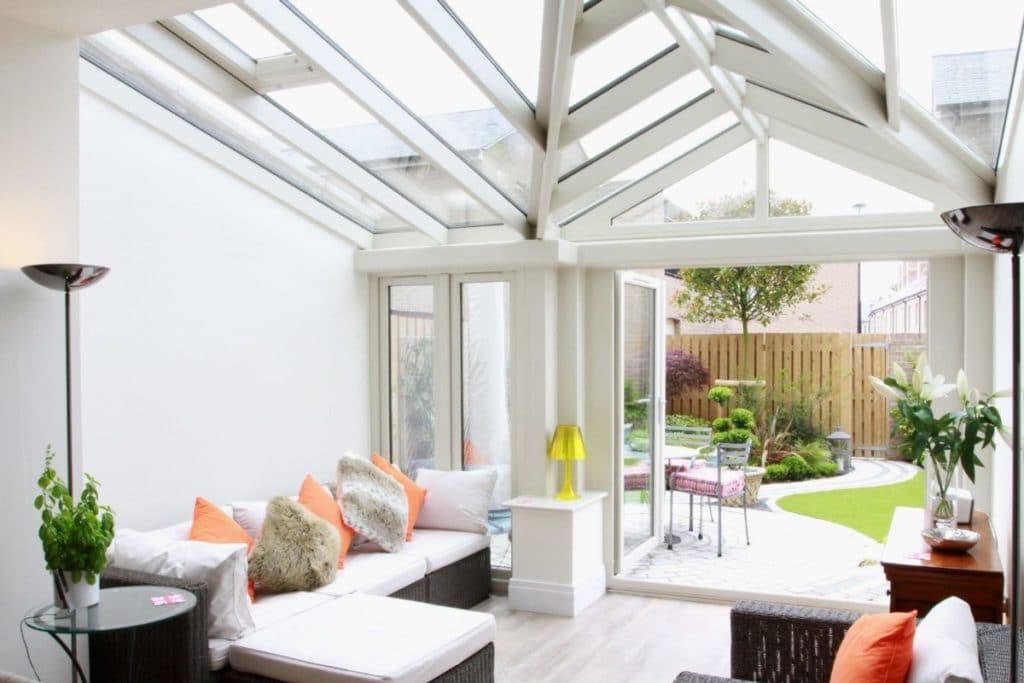
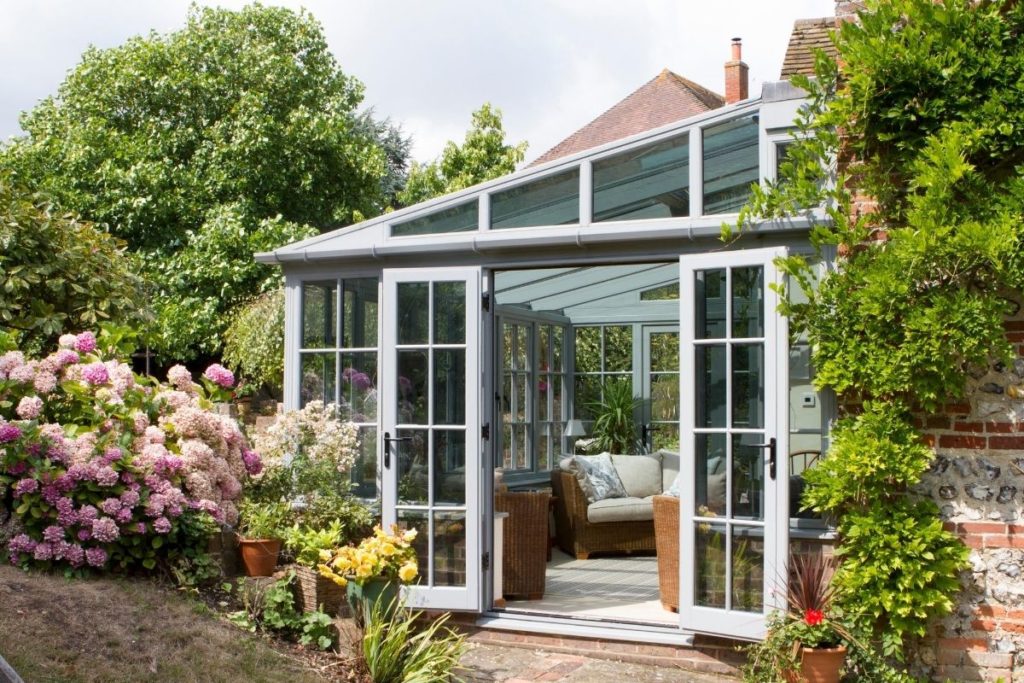
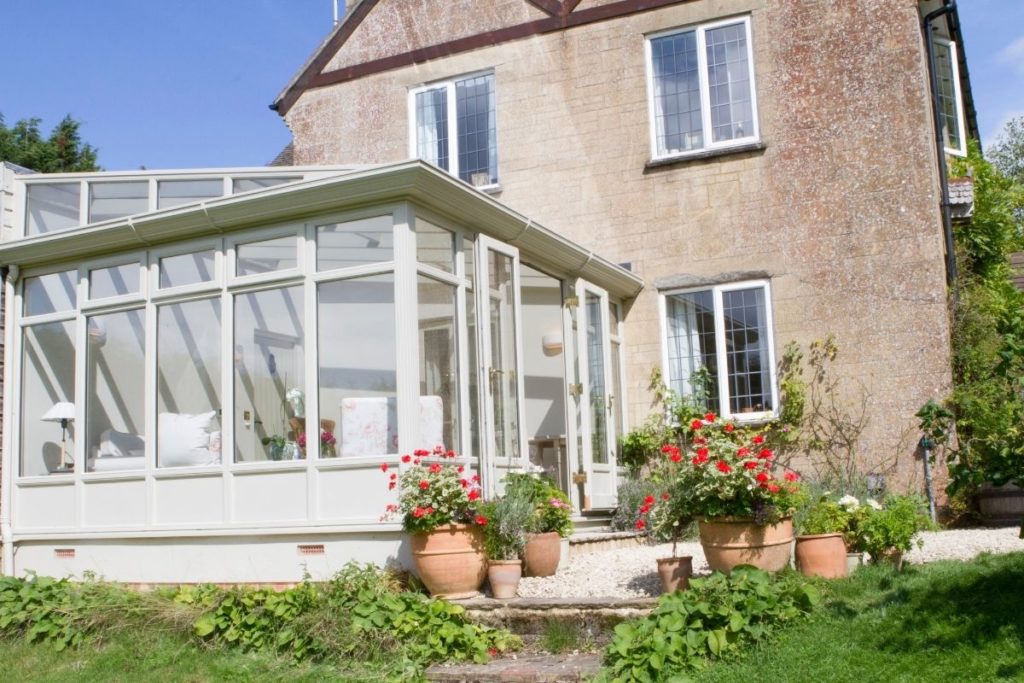
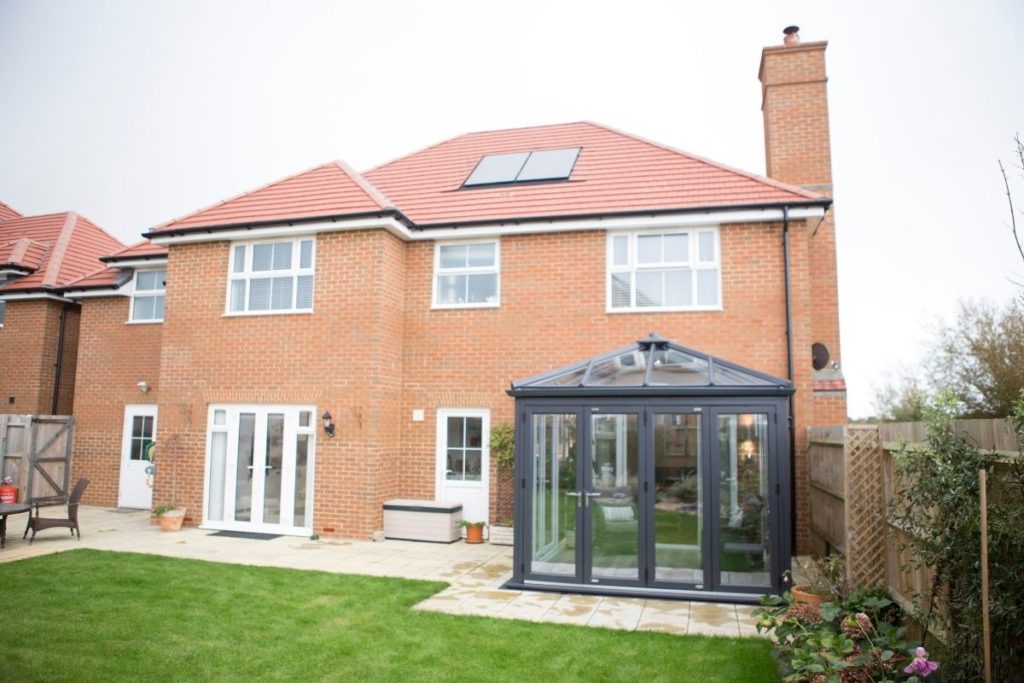
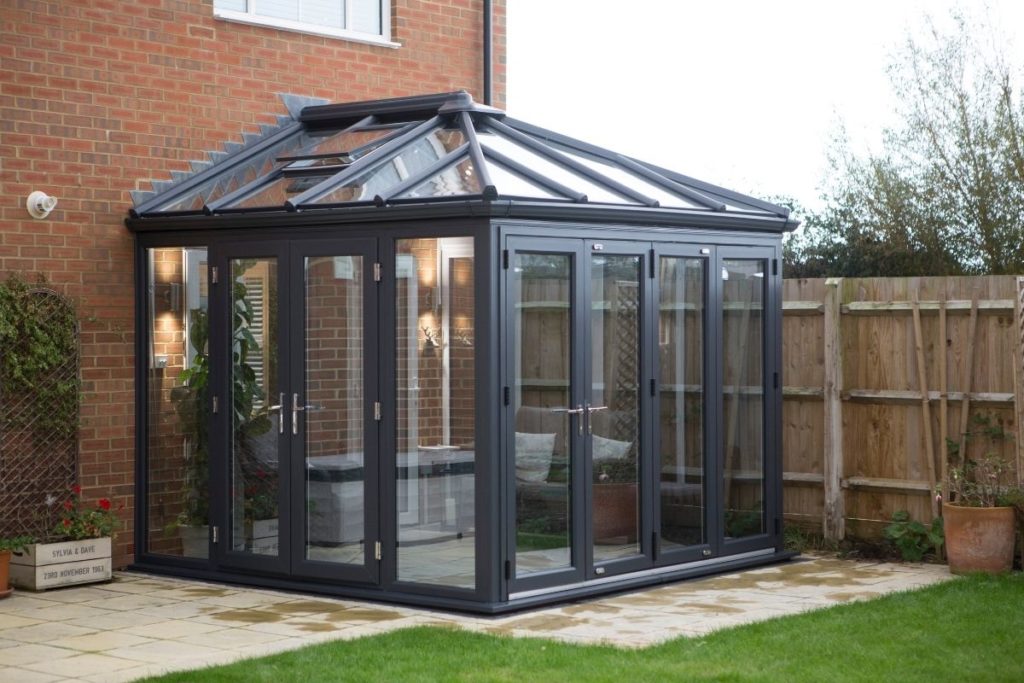
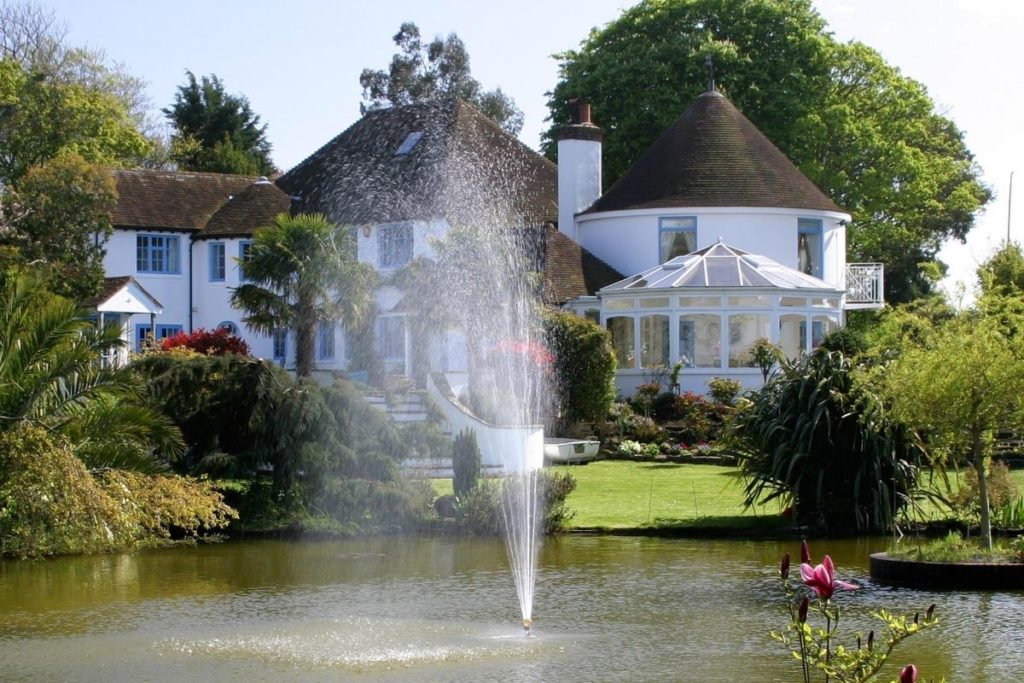
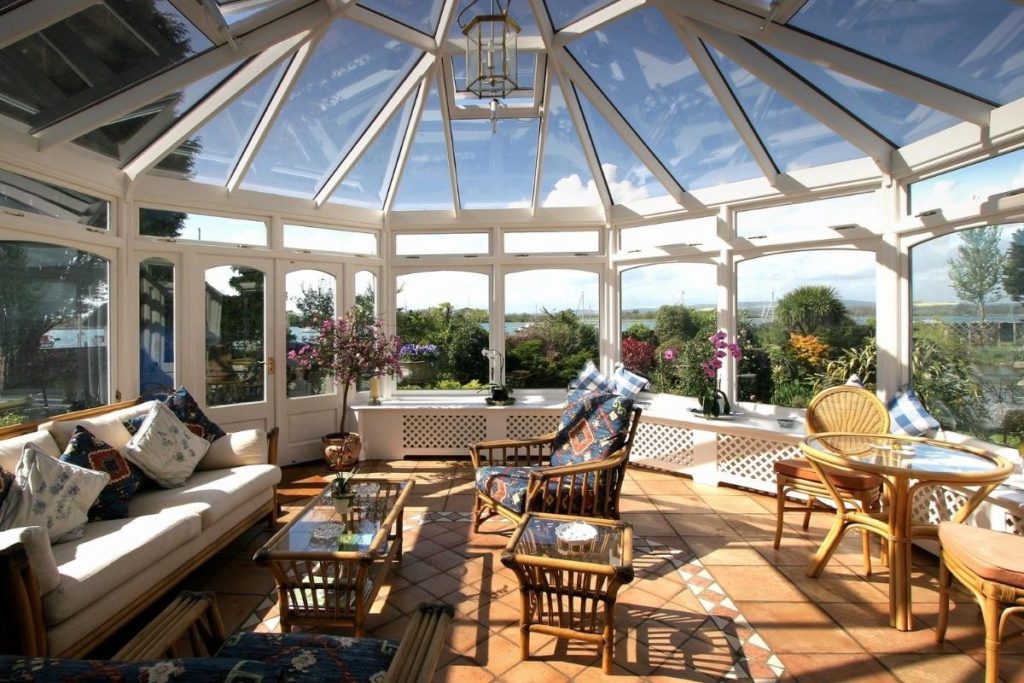
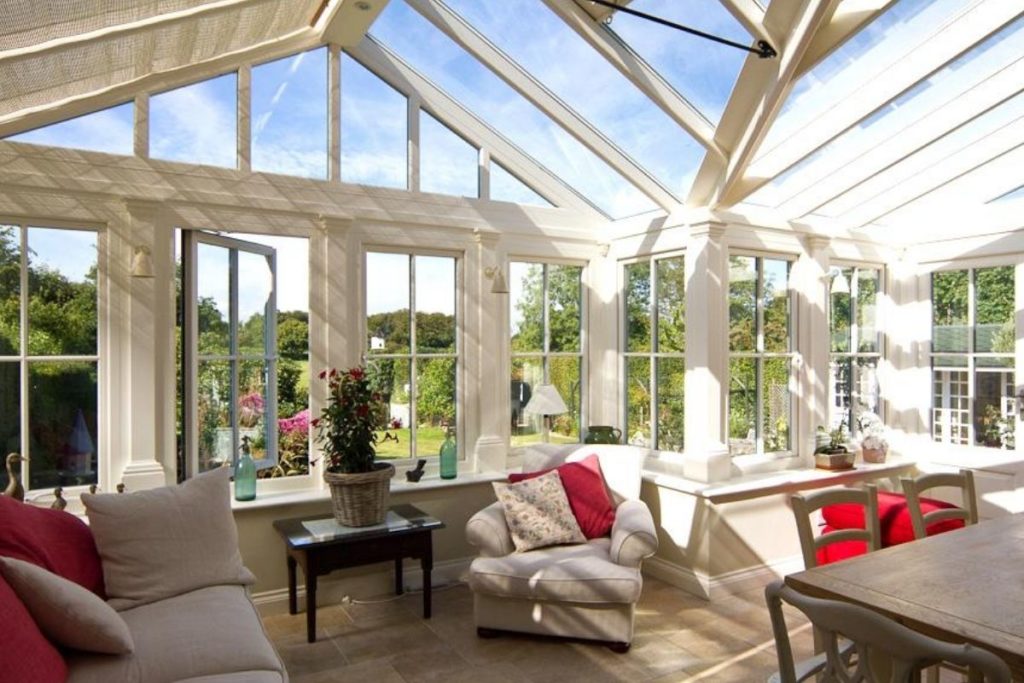
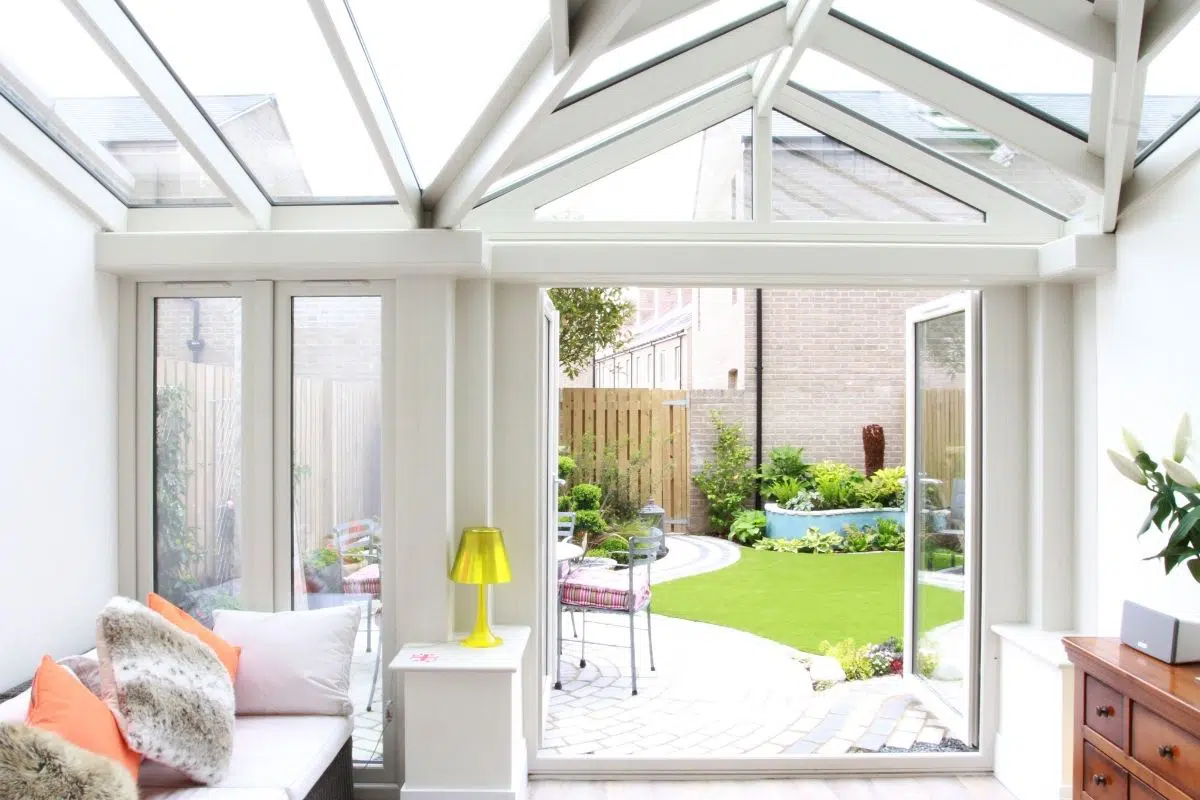
A Stylish & Functional Conservatory Design: The Gable Feature
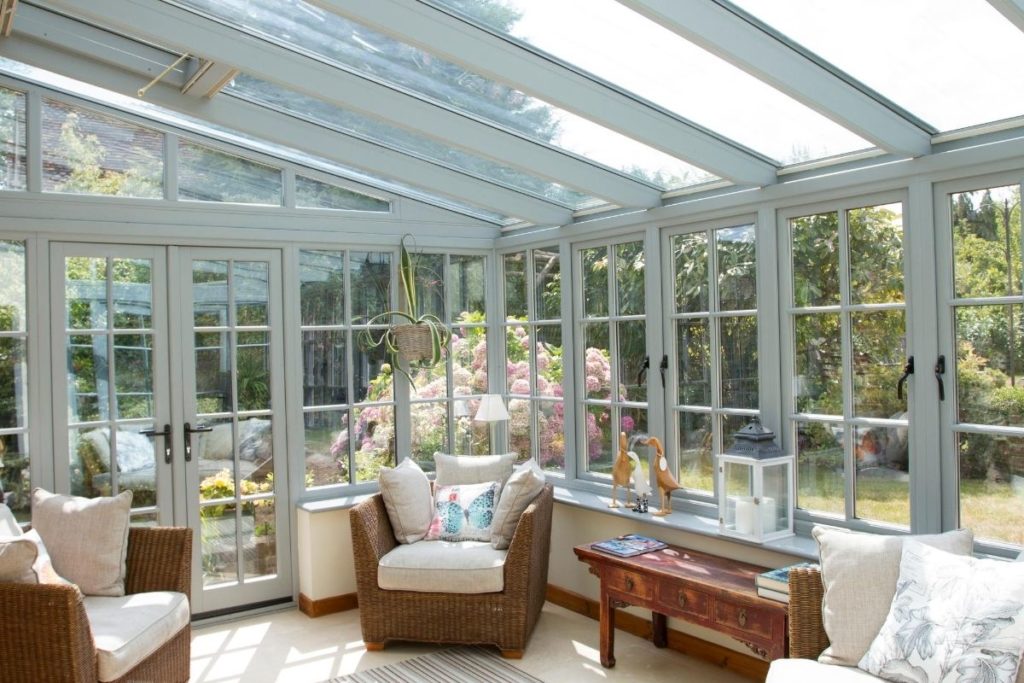
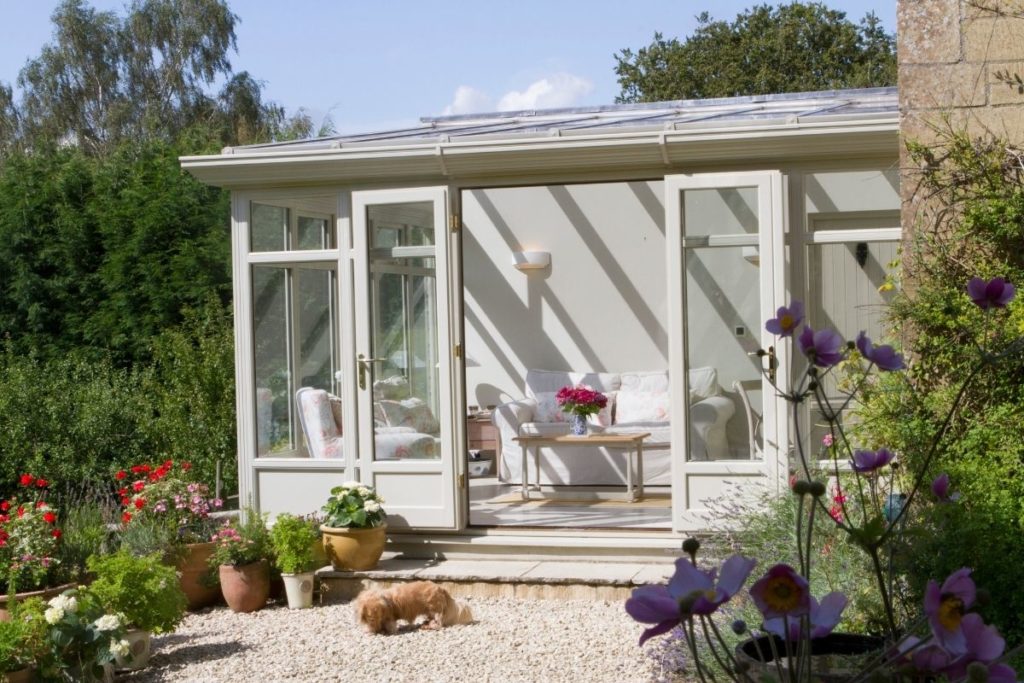
The roof design can make or break an open plan space. A standard lean-to roof (sloping in one direction) is simple and effective, but our clients wanted something with more architectural presence. The solution? A central gable-end roof feature that rises above the lean-to slope, creating a dramatic triangular focal point.
Why combine lean-to and gable?
- Visual interest: The gable breaks the monotony of a flat roofline, drawing the eye upward.
- Extra light: The vertical face of the gable can be fully glazed, flooding the centre of the room with sunlight.
- Height and space: Inside, the ceiling soars in the gable section, making the room feel grander—ideal above a dining table or lounge seating.
- Symmetry: When placed centrally, the gable anchors the whole extension, giving a balanced, elegant facade.
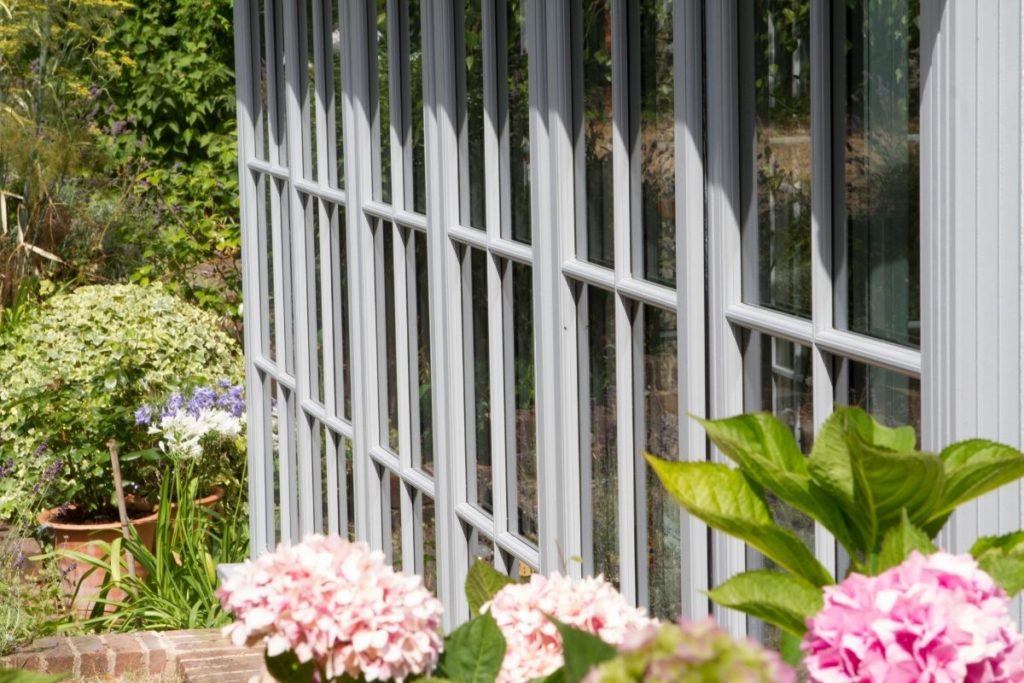
To maximise comfort, the entire roof was fitted with solar-control, self-cleaning glass (U-value 1.0 W/m²K). An electrically operated skylight in the gable face provides automated ventilation—fresh air at the touch of a button.
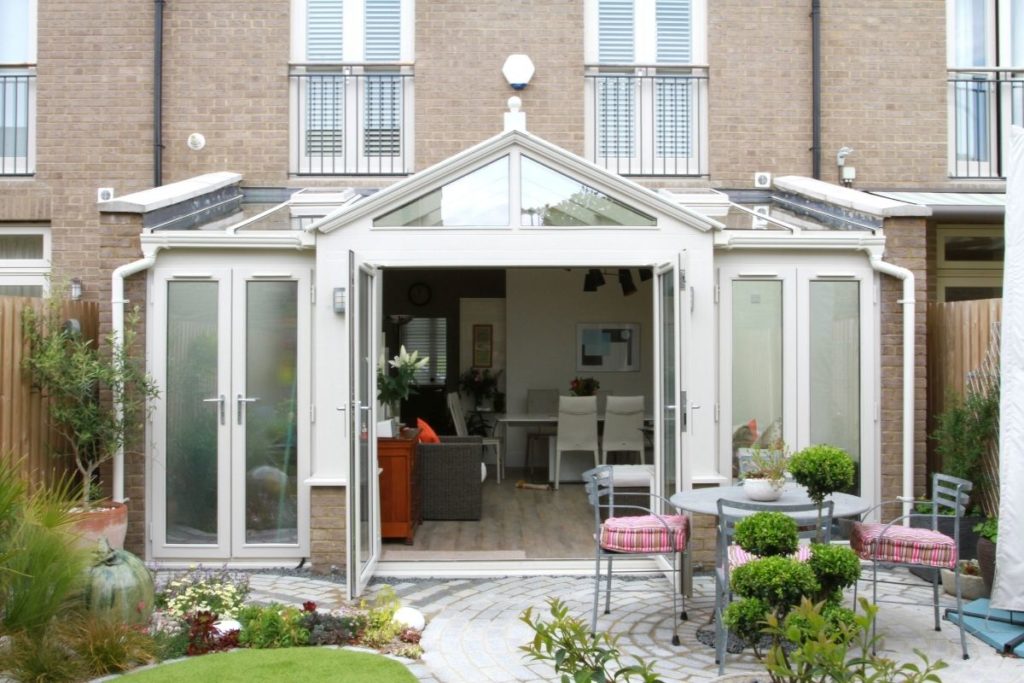
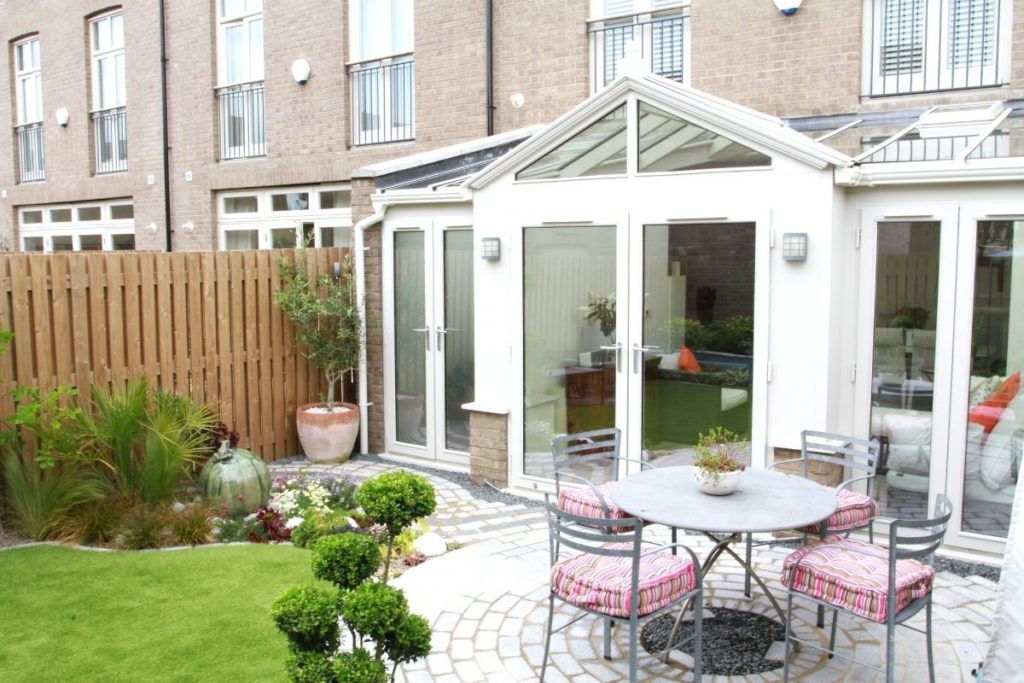
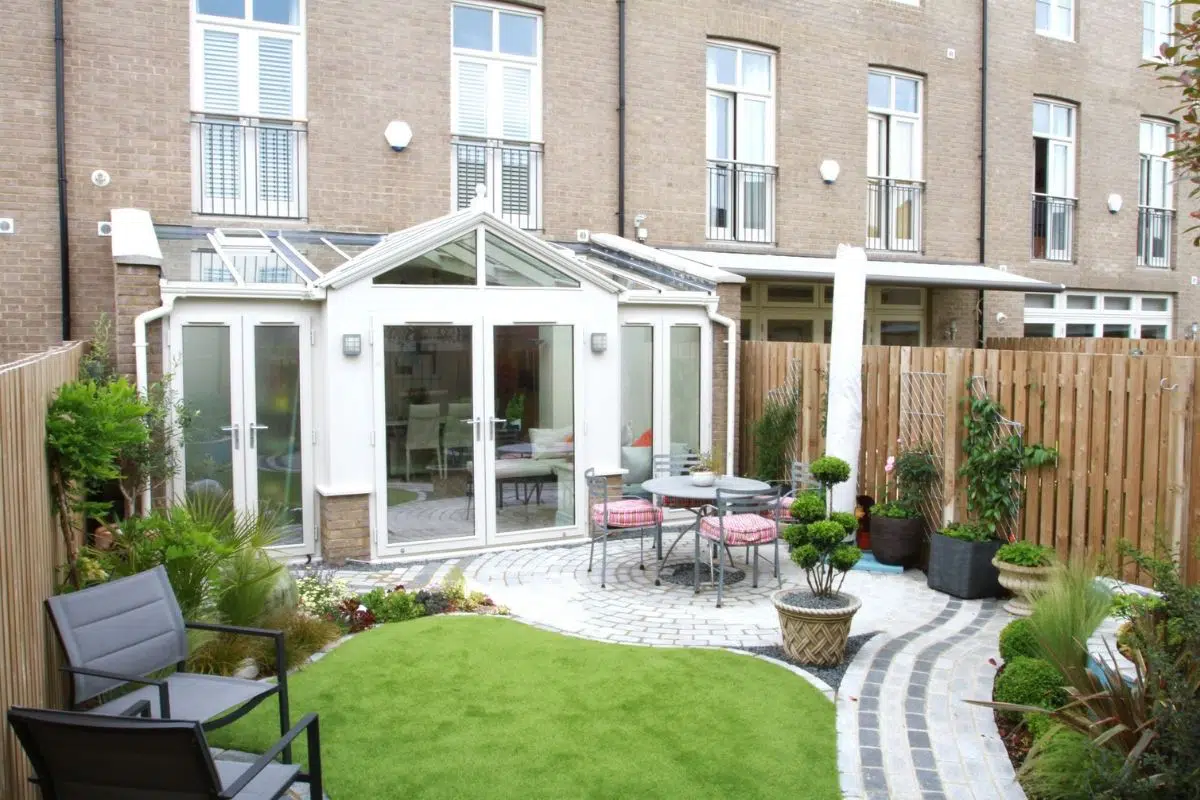
Perfect Symmetry & Garden Access
The footprint was designed to be highly functional while maintaining a pleasing aesthetic from both inside and out.
Zoning the space
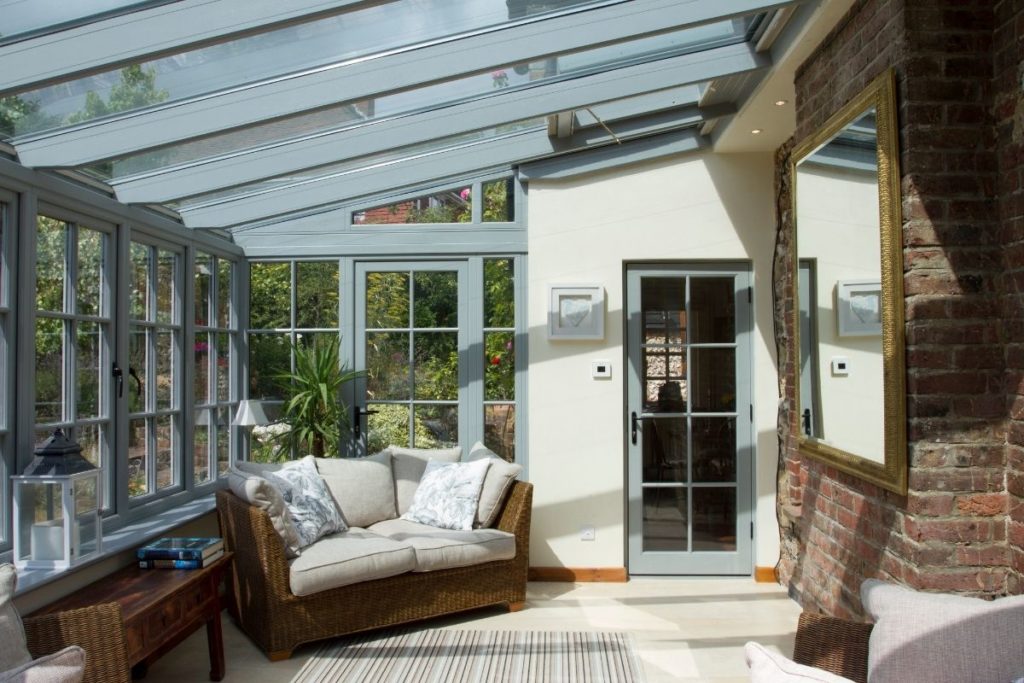
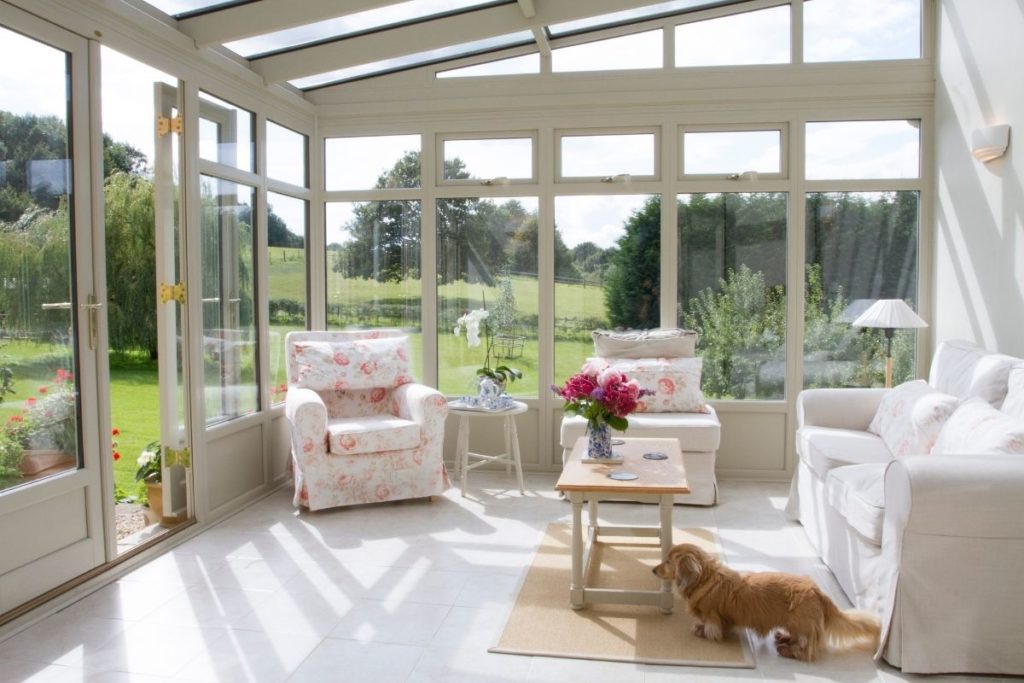
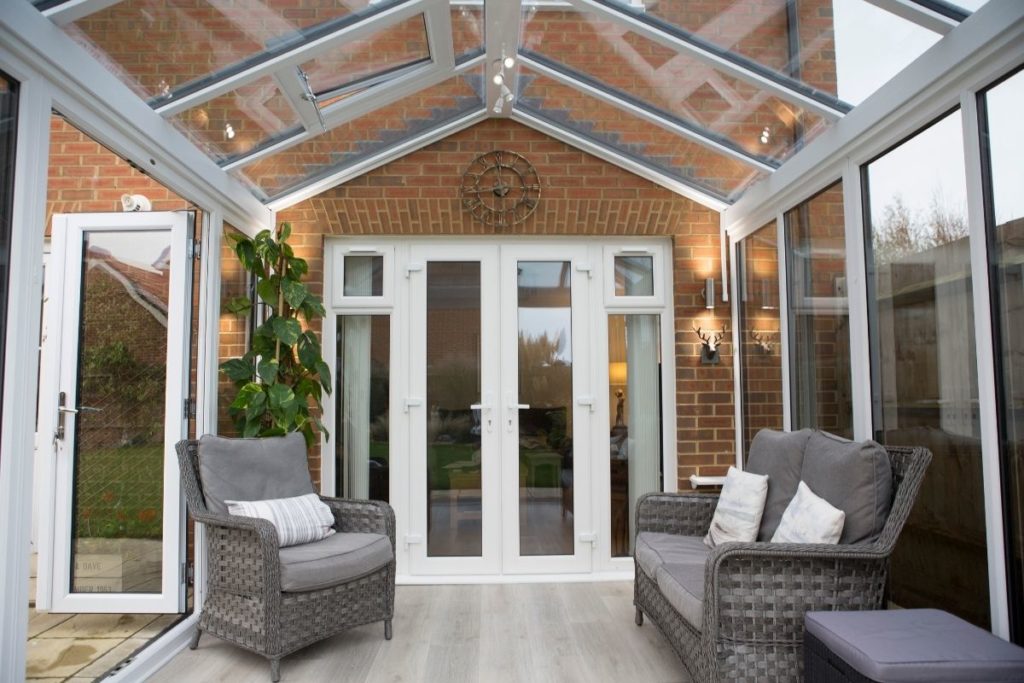
- Left side (utility): A separate utility room was tucked to the right (as you look from the house). It houses washing machine, dryer, and storage, hidden behind a partition wall but accessible via a half-glazed door. This keeps laundry noise and clutter away from the open plan area.
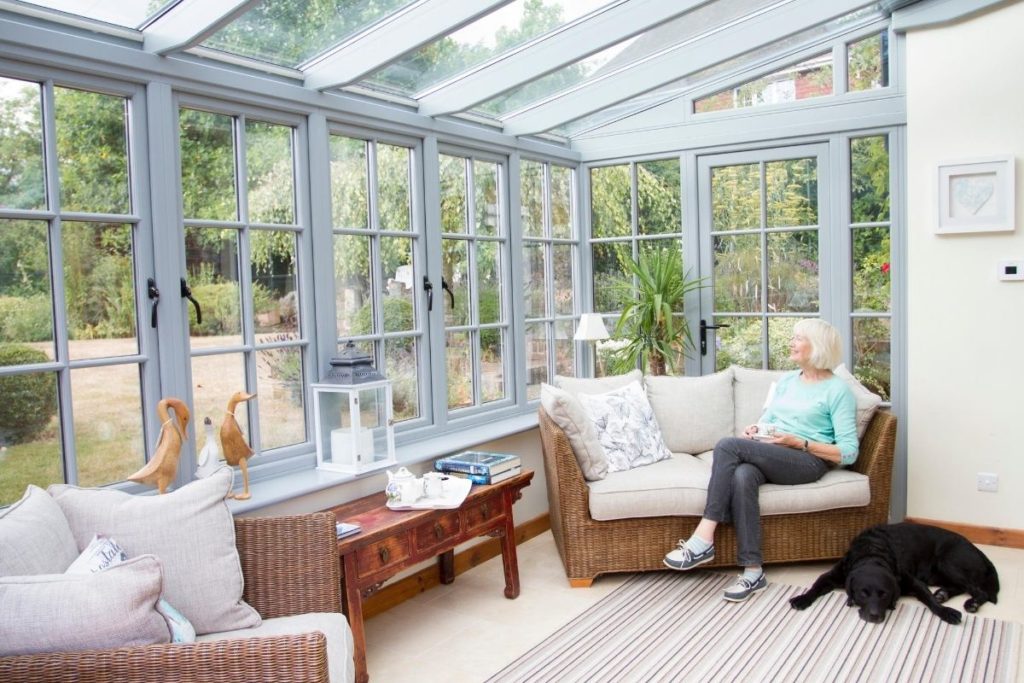
- Central dining zone: Directly ahead as you enter, with space for an 8-seater table.
- Right side lounge: A comfortable seating area with two floor-length windows overlooking the garden.
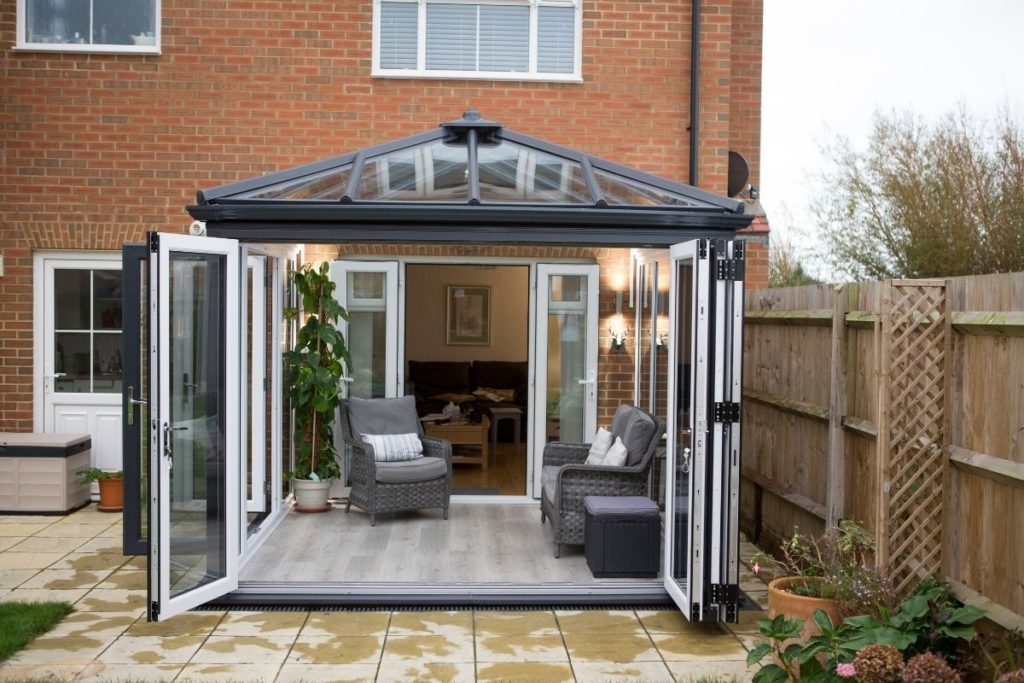
Door configuration – symmetry matters
From the outside, the white timber-framed conservatory presents a perfectly symmetrical elevation:
- Large French doors open from the lounge onto a round mosaic patio – perfect for stepping out with a morning coffee.
- Double patio doors on the left connect the kitchen to the garden via the utility room, creating a handy route for bringing in shopping or muddy boots.
- Two floor-length windows on the right mirror the patio doors opposite, maintaining visual balance.
- Decorative dwarf brick walls match the existing house brick, tying the extension to the original structure.

Year-Round Comfort: Insulation, Heating & Glazing
An open plan living-dining space must be usable in January as well as July. Here’s how we achieved that:
Insulation
- Below floor: 100mm PIR insulation board beneath the screed, with edge insulation to prevent thermal bridging.
- Walls: Cavity walls with blown bead insulation (U-value 0.18).
- Roof: Triple-layer low-E argon-filled glazing with warm-edge spacers.
Heating
Underfloor heating (water-based) was installed throughout the extension, zoned separately for the lounge and dining areas. This provides gentle, even warmth without radiators breaking up the glazing. The system runs off the existing gas boiler, with an independent thermostat.
Glazing specification
- G-value: 0.35 (blocks 65% solar heat, reducing summer overheating)
- Light transmission: 72% (keeps the space bright)
- Self-cleaning coating: photocatalytic layer that breaks down dirt – rain washes it away.
❄️ Winter warmth tip
Combine underfloor heating with low-E glass and insulated blinds for maximum comfort. The thermal mass of a screed floor absorbs heat during the day and releases it slowly in the evening.
Planning Permission & Building Regulations
Most single-storey rear extensions in England fall under Permitted Development if:
- Single storey, rear extension ≤4m (detached) or ≤3m (semi/terraced)
- Maximum height ≤4m, eaves ≤3m
- Materials similar to existing house
This project sat within those limits, so no full planning application was needed. However, because we removed an external wall, Building Regulations approval was mandatory. Key aspects checked:
- Structure: Steel beam design and calcs.
- Thermal performance: U-values of glazing, floor, walls.
- Ventilation: Opening skylight (equal to 5% of floor area) for purge ventilation.
- Electrical safety: Part P certification for all new circuits.
Listed buildings, Conservation Areas, AONBs always require permission. See our full planning guide for details.
How Much Does an Open Plan Living-Dining Conservatory Cost?
Costs vary significantly based on size, specification, and site conditions. For a medium-sized extension (25-35m²) similar to this project:
- Timber frame & glazing: £35,000 – £55,000
- Foundations & groundworks: £8,000 – £15,000 (depends on soil type)
- Steel beam & wall removal: £3,000 – £6,000
- Underfloor heating & screed: £4,000 – £7,000
- Internal finishes (plastering, flooring, electrics): £6,000 – £12,000
Total estimated range: £55,000 – £95,000 + VAT. Gable roof features, bifold doors (instead of French), and high-end glazing add to the cost.
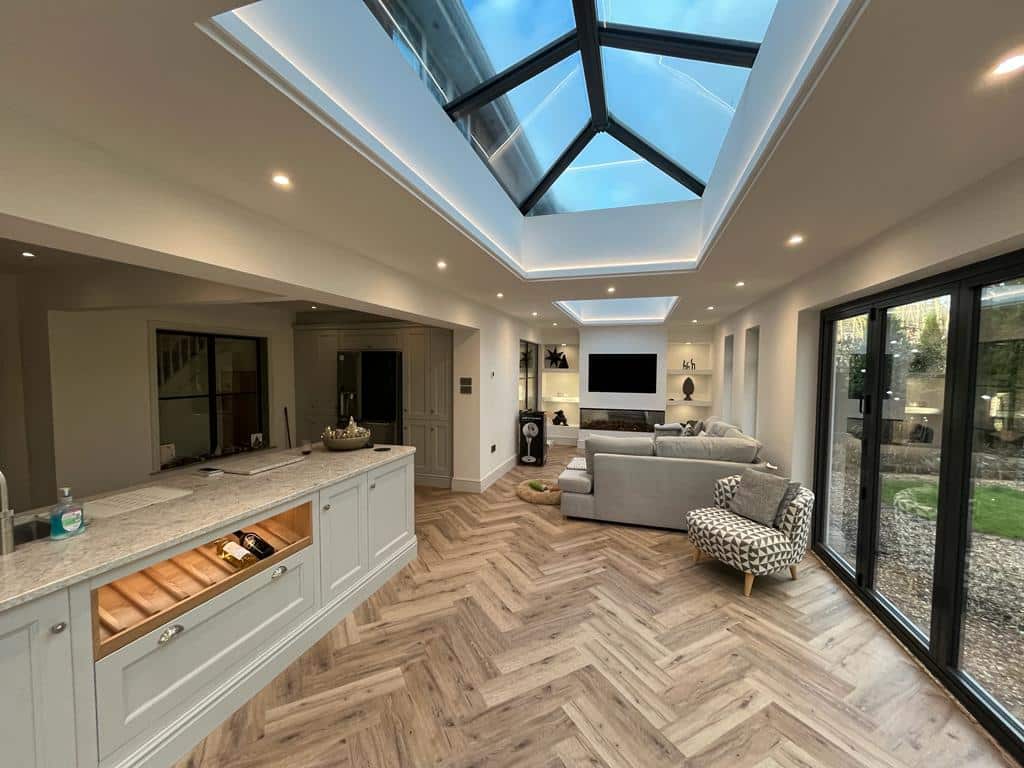
✨ The finished space: living, dining, utility, garden
With its light-filled atmosphere and seamless layout, this open plan living-dining conservatory extension has transformed how the family uses their home. The integrated utility keeps practical chores out of sight; the generous lounge and dining area host gatherings with ease; and the garden is now a true extension of the living space. Whether it’s a quiet Sunday with books or a summer dinner party, the room adapts effortlessly.

Frequently Asked Questions – Open Plan Living-Dining Conservatories
Can I really remove the whole wall between house and conservatory?
Yes, but it’s structural. You’ll need a steel beam (RSJ) designed by an engineer, plus Building Regulations approval. The work must be done by a qualified builder. The result is a completely open, seamless space.
What’s the best roof for an open plan living-dining extension?
A combination lean-to with a central gable-end roof feature is extremely popular. It adds height, drama, and extra light. Fully glazed with solar-control glass, it stays bright without overheating.
How do I zone a living and dining area in a conservatory?
Use furniture placement: dining table near the kitchen/house end, lounge seating toward the garden. Different floor finishes (tiles in dining, timber in lounge) can also define zones without closing off the space.
Will a glass extension be too cold in winter?
Not with modern glazing. Low-E coatings, argon gas fills, and warm-edge spacers give U-values as low as 1.0. Combined with underfloor heating, it’s comfortable all year.
Can I add a utility room to my open plan conservatory?
Absolutely. In the project shown, a separate utility was tucked to one side, accessed via a half-glazed door. It keeps laundry hidden but convenient.
What doors are best for garden access?
French doors offer classic charm and wide openings; bifold doors fully retract to merge indoors and outdoors. For symmetry, match door sizes and positions on each side.
Call us anytime on 01243 538999 – David our digital assistant will take a few details so the right specialist can follow up personally.
Design your open plan living-dining extension
Book a free consultation (virtual or on‑site). We’ll discuss your layout, roof style, glazing options, and provide a fixed quotation.
Get a quote →